
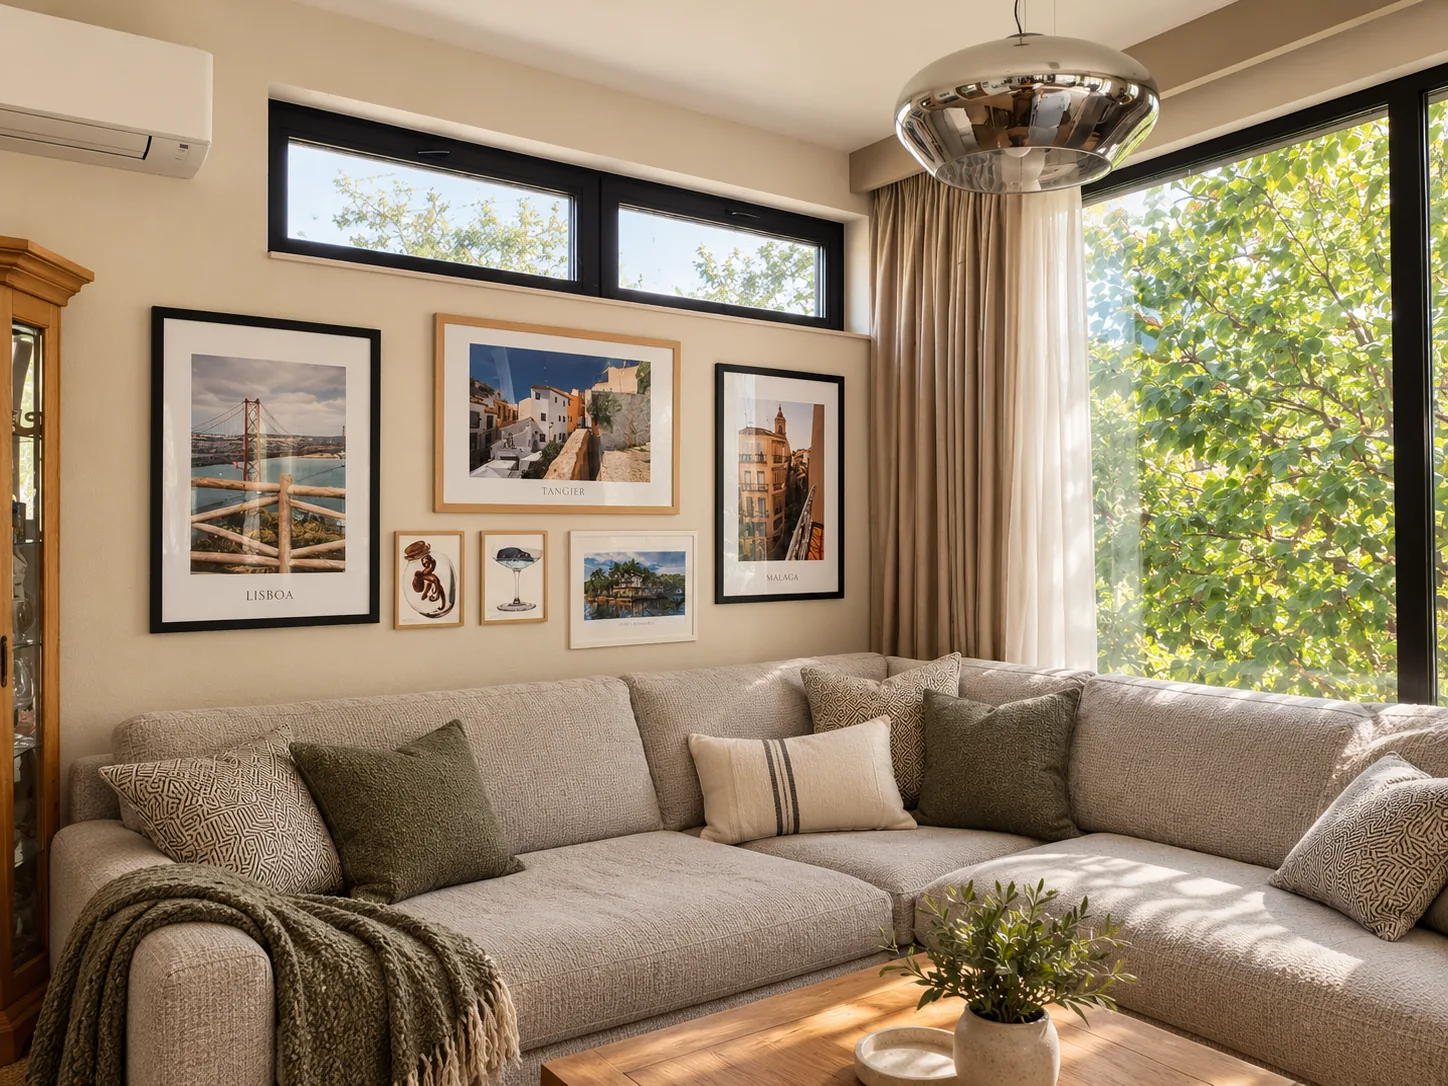
The wall above my living room sofa had been reserved for photographs for quite some time. I knew what I wanted to display: images from my travels, different in format but connected by a similar atmosphere. The challenge was finding the right arrangement.
As a photographer, I’m accustomed to thinking in terms of composition, proportions, visual weight, the balance between light and shadow, and the direction of lines. Arranging photographs on a wall involves much the same principles. The difference is that moving a frame a few inches isn’t quite as easy as adjusting a composition in Photoshop.
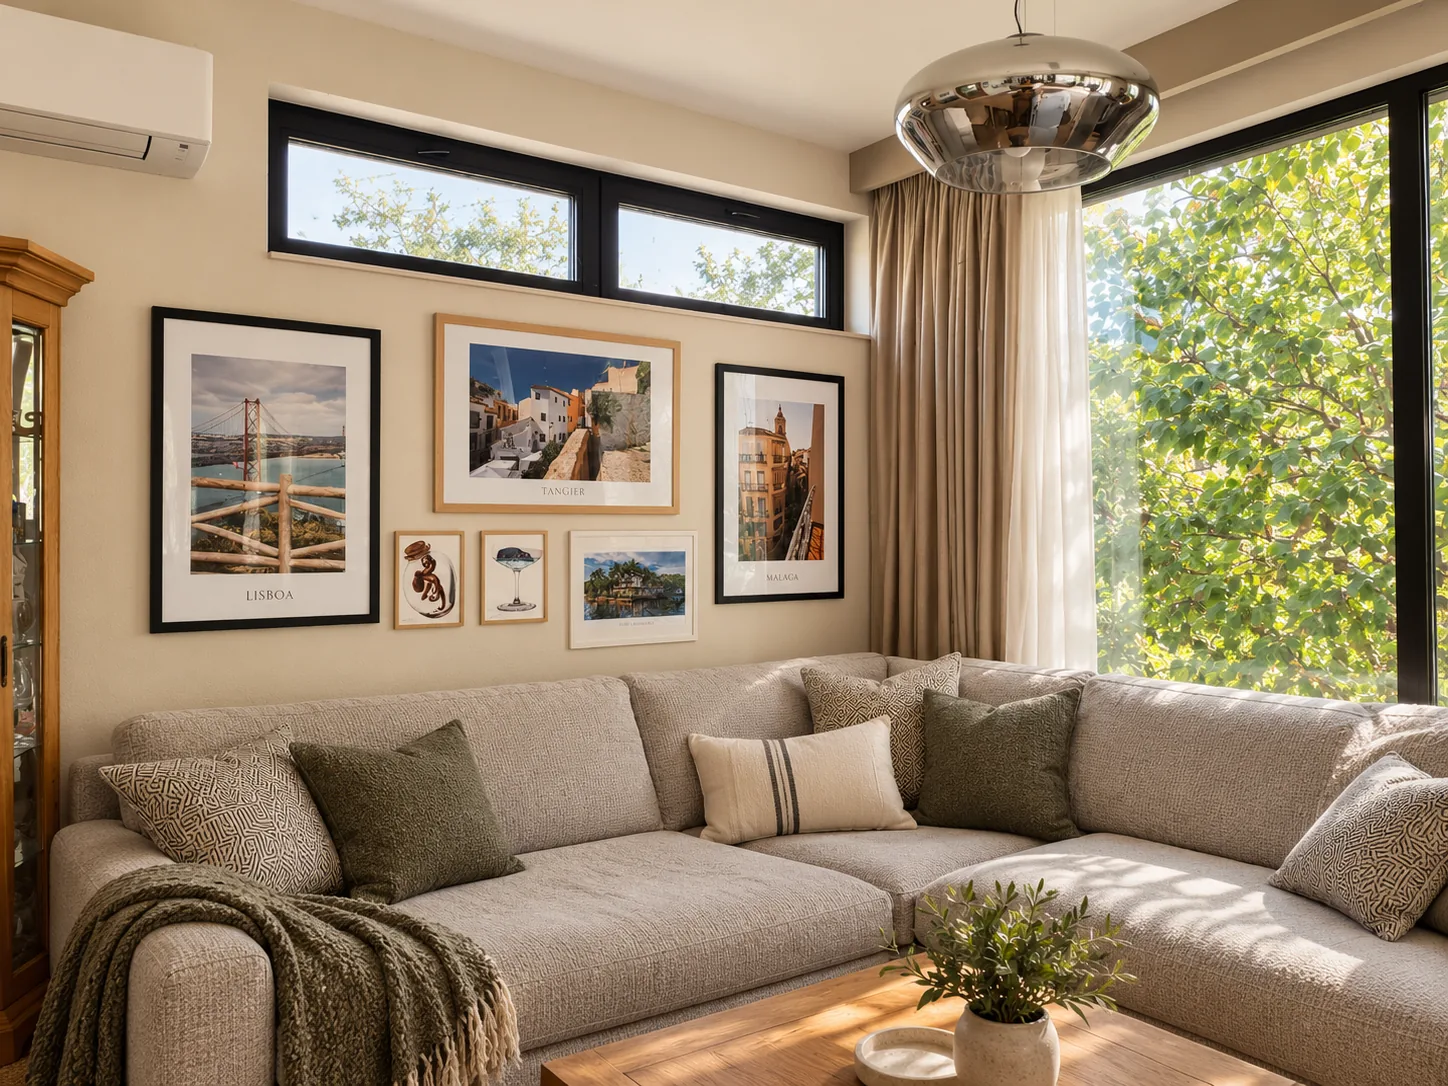
I chose ready-made frames in several sizes and prepared my travel photographs with generous white borders and discreet location captions. Lisbon, Tangier, and Málaga became the foundation of a personal gallery, without the expense of having every frame custom-made.
Start With the Wall, Not the Artwork
The width of the sofa, the available wall space, nearby windows, curtains, and furniture all influence the composition.
My gallery sits above a large sectional sofa, with horizontal windows directly above it, a wooden cabinet on one side, and curtains on the other. Simply finding the mathematical center of the wall wasn’t enough.
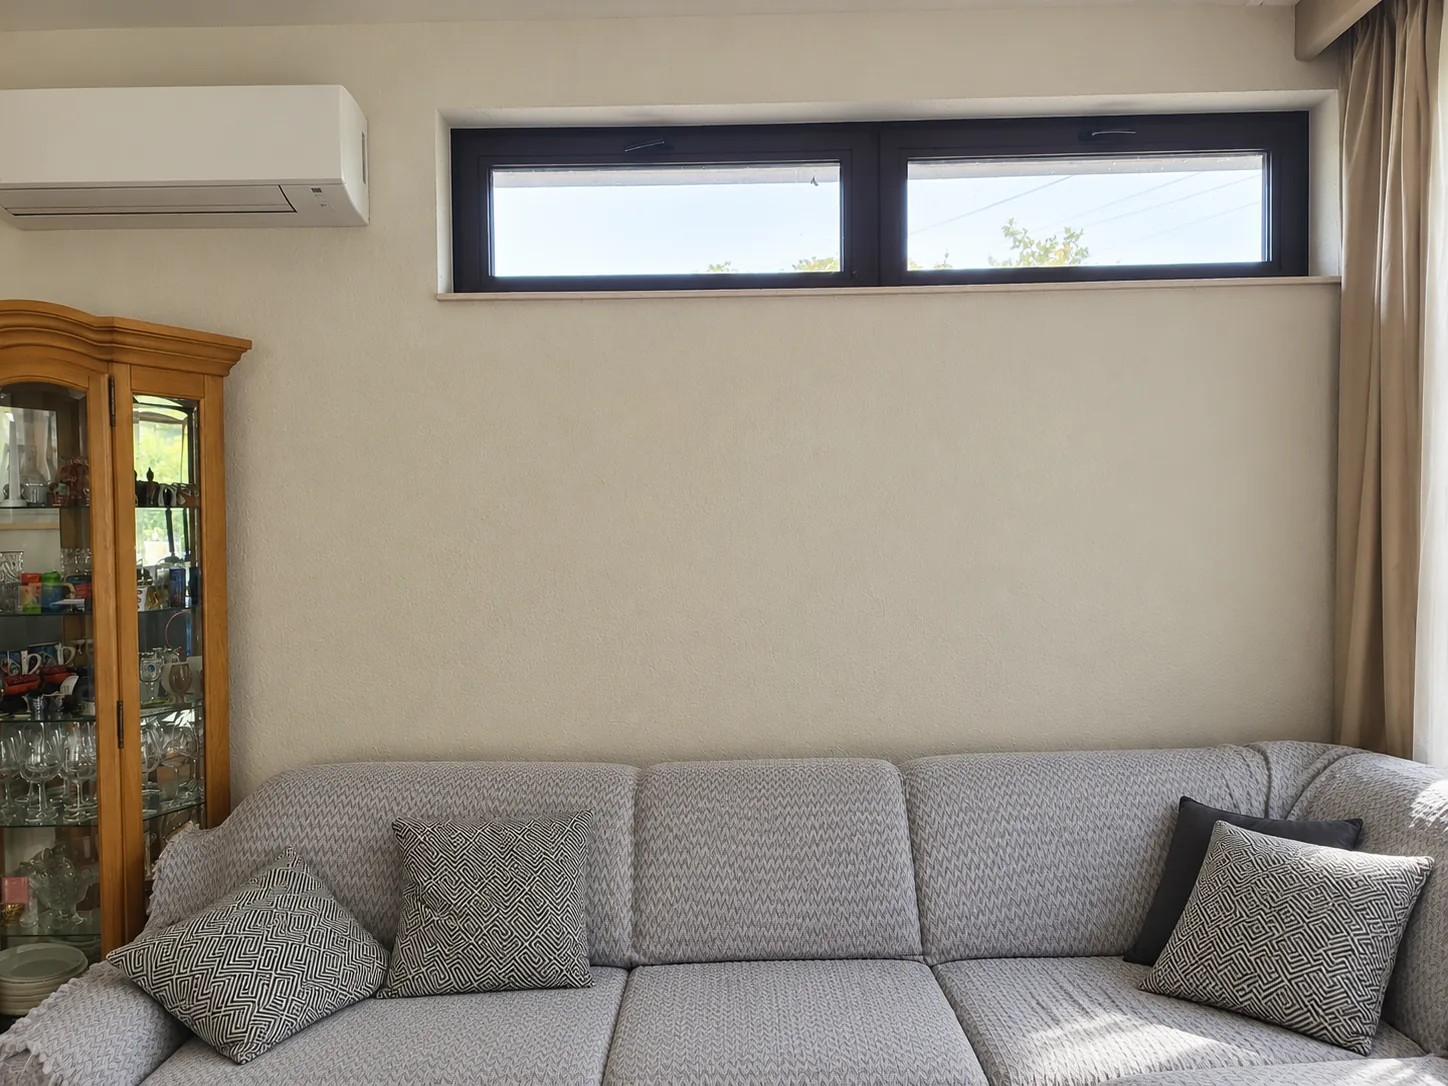
How wide should a gallery wall be above a sofa?
A useful starting point is to make the artwork arrangement approximately two-thirds to three-quarters of the sofa’s width.
For a sofa measuring 96 inches wide, that suggests a gallery approximately 62–72 inches across.
These numbers are guidelines, not rigid rules. With a sectional sofa or architectural features interrupting the wall, visual balance matters more than following a percentage precisely.
Choosing Frame Sizes and Creating Balance
I selected two large portrait frames for the sides and a landscape frame in the center, with smaller pieces completing the lower portion of the arrangement.
The three larger images establish the structure. The portrait formats introduce height, while the horizontal photograph connects the composition.
I combined black and natural wood frames. Black provides definition; wood adds warmth. Consistent white borders give the photographs a shared visual language despite their different orientations.
The smaller images are still temporary. I’m gradually selecting photographs from my archive that fit the travel theme more closely. Having thousands of photographs isn’t always an advantage when you only need six.
How to Measure and Plan a Gallery Wall
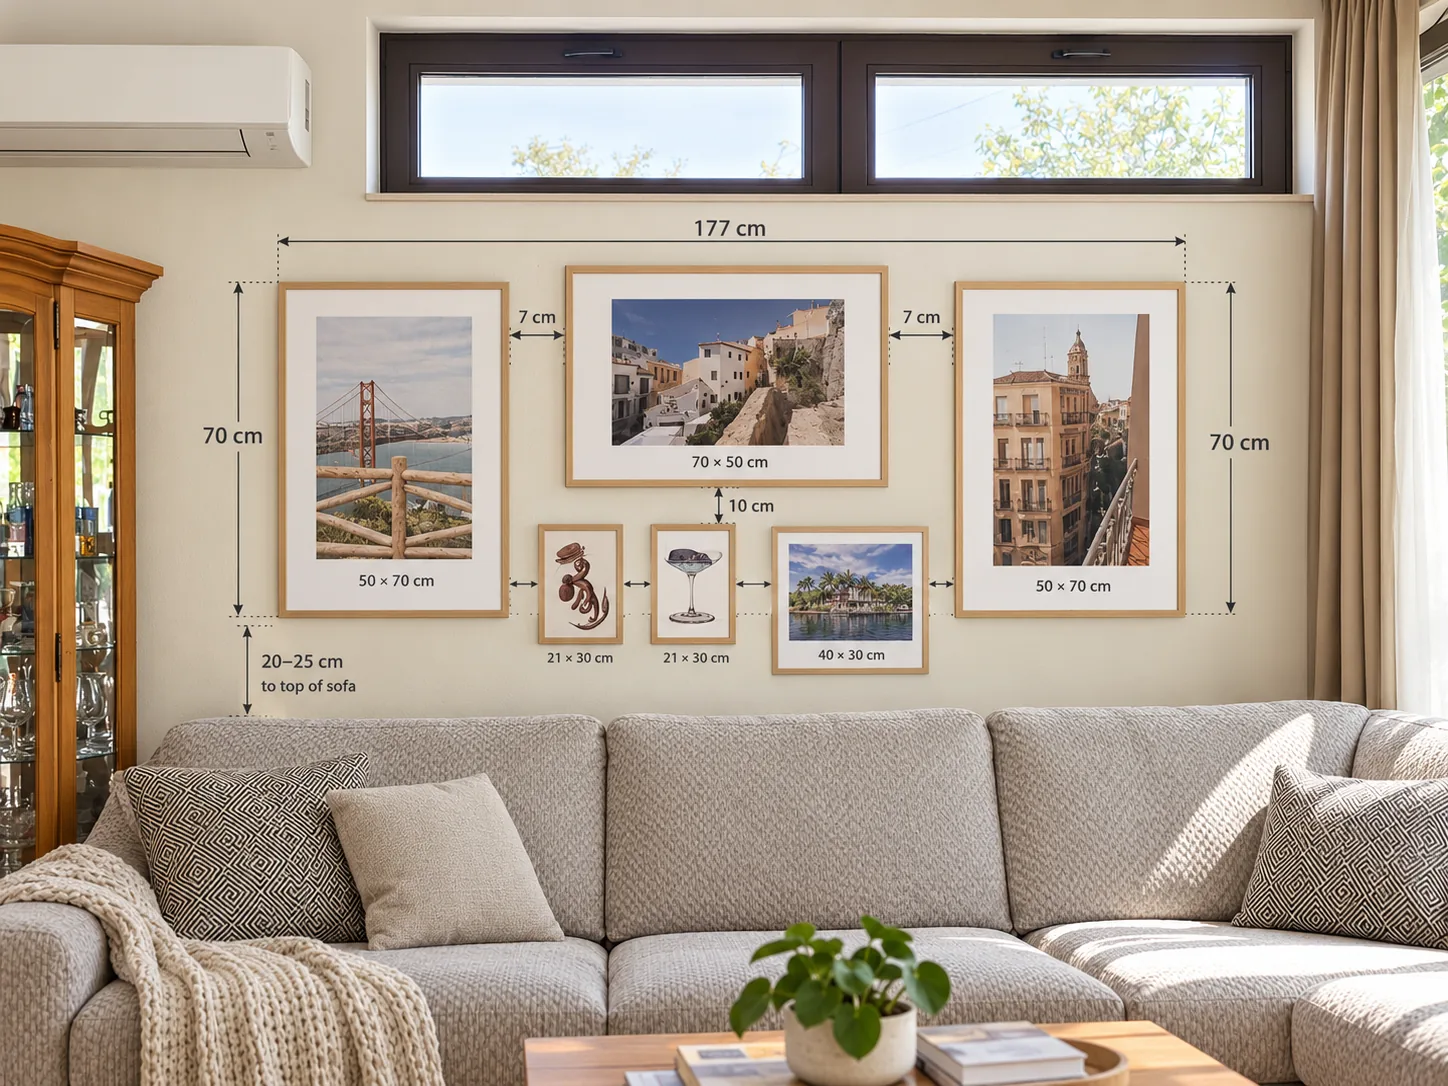
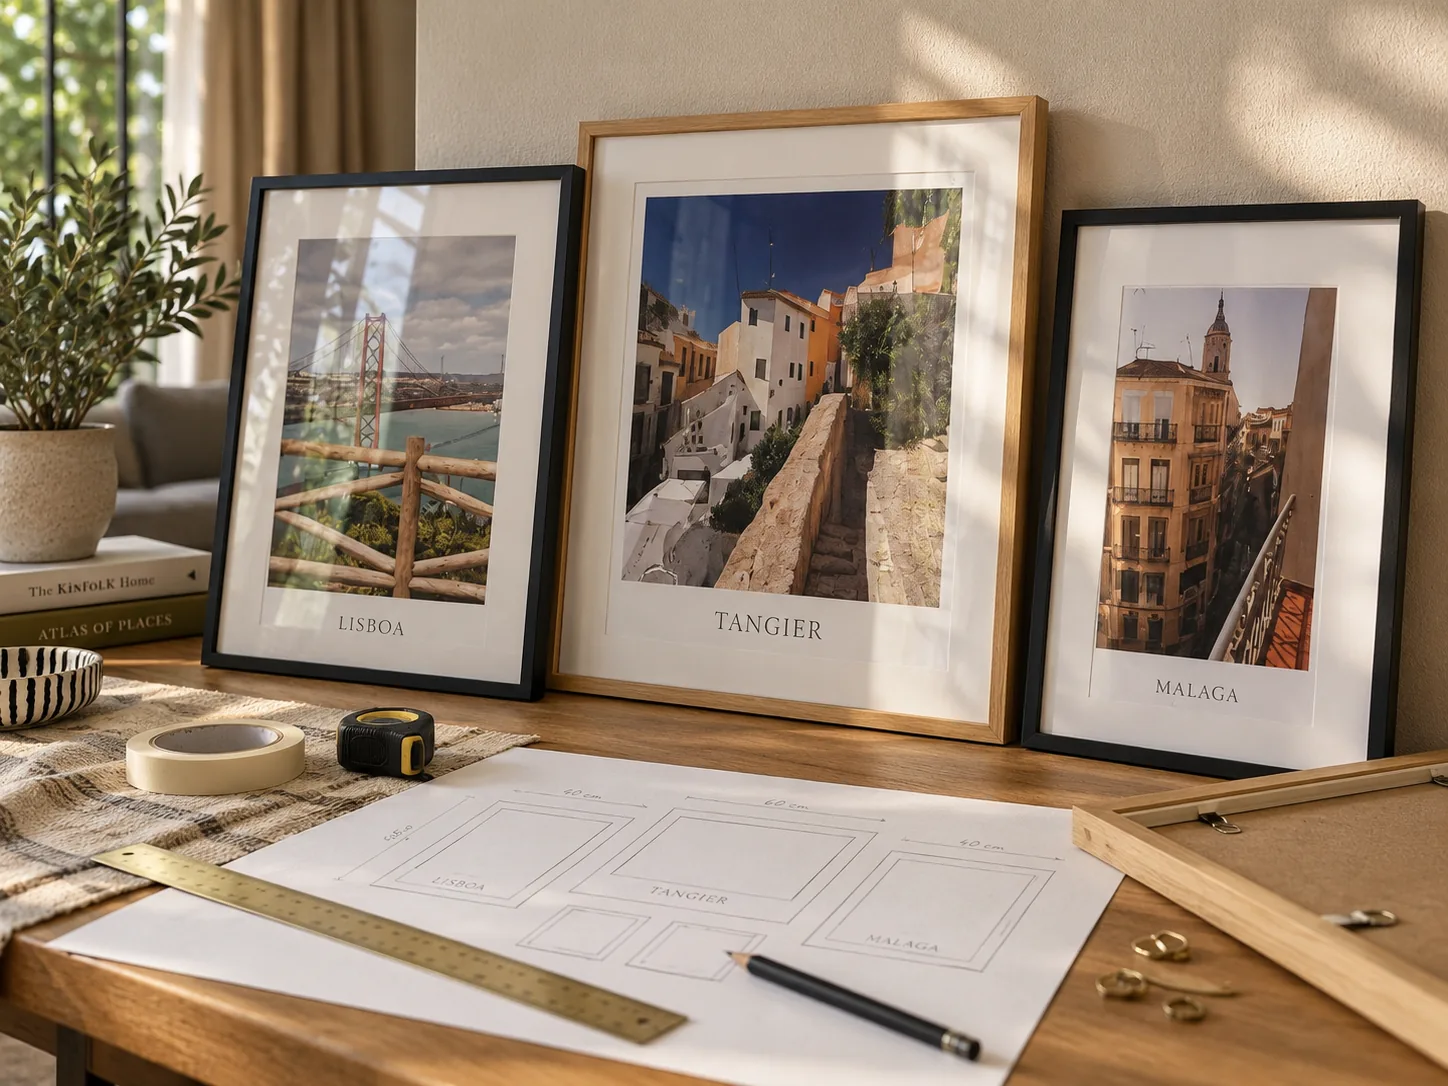
For a mixed-size arrangement, I prefer drawing a measured layout before hanging the frames. It allows me to calculate the total width, check the spacing, and establish a visual center.
Always measure the outside dimensions of the frames, not just the print size. An 11 × 14-inch picture frame can be noticeably larger once the frame profile is included.
Example: calculating the total width
Let’s consider a hypothetical arrangement with three main frames and two gaps.
| Element | Outside width |
|---|---|
| Left portrait frame | 16.5 in |
| Gap | 3 in |
| Center landscape frame | 24.5 in |
| Gap | 3 in |
| Right portrait frame | 16.5 in |
| Total | 63.5 in |
If the available wall is 75 inches wide, the remaining space is:
That leaves approximately 5.75 inches on either side of a centered arrangement.
These are sample measurements to illustrate the method, not the actual dimensions of my living room.
Creating a scaled layout
You can draw your composition on graph paper or create it digitally in Canva, PowerPoint, or another design program.
Work to a consistent scale. If you choose 1:10, for example, a 40-inch frame becomes 4 inches on your drawing, while an 8-inch gap becomes 0.8 inches.
This makes it easy to compare different frame sizes, adjust their positions, and establish the overall proportions before making any holes in the wall.
Gallery Wall Spacing and Hanging Height
For arrangements with different frame sizes, gaps of approximately 2–4 inches are a useful starting point.
Smaller frames can often be grouped more closely. Larger photographs may benefit from a little more breathing room.
Consistency is more important than any particular measurement. When the gaps follow a recognizable rhythm, the eye reads the separate images as one composition.
How high should art hang above a sofa?
A practical starting point is to position the bottom of the gallery approximately 6–10 inches above the sofa back.
This connects the artwork visually to the furniture rather than allowing it to float too high on the wall.
In my room, the horizontal windows created an additional limitation. The gallery needed breathing room above and below.
Four Gallery Wall Layouts That Work
1. Three Large Frames in a Row
Three photographs of identical size, arranged horizontally with equal gaps.
An elegant option for minimalist interiors. It works particularly well with a cohesive photographic series: landscapes, botanical portraits, or travel images from the same destination.
2. One Large Photograph With Two Smaller Prints
A statement photograph provides the focal point, while two smaller frames are stacked vertically alongside it.
This is a useful solution for narrower walls and compositions with one particularly strong image.
3. The Balanced Asymmetrical Gallery
Different frame formats arranged around a common visual center.
This is the approach I chose for my living room. The larger photographs establish the structure, while smaller pieces contribute rhythm and detail.
Asymmetry may look effortless, but achieving visual balance usually takes more planning than a simple grid.
4. The Gallery Grid
Four or six identically sized frames arranged in two rows.
The grid is easy to measure and works beautifully with botanical photographs, black-and-white images, and coordinated fine art print collections.
How to Calculate Picture Hook Positions
Once the frame positions are established, measure the distance from the top edge of each frame to its actual hanging point.
For example, suppose you want the top edge to sit 72 inches above the floor, and the hanger is positioned 3 inches below the frame’s top edge.
The wall hook should be installed 69 inches above the floor.
For frames with hanging wire, measure the wire under tension. Check each frame separately and use hardware appropriate for the wall material and frame weight.
Before drilling, check for concealed electrical wiring or plumbing in the installation area.
Preparing Photography Prints for Framing
I prepared my travel photographs with generous white margins and small location captions. This gives images from different destinations a consistent presentation.
Before printing, check the file’s resolution, aspect ratio, crop, colors, and the intended output size.
A high-quality home photo printer can be perfectly suitable for smaller decorative prints. For larger photographic artwork, I would choose professional printing on good matte or fine art paper.
Digital White Borders or Traditional Matting?
The two approaches may look similar, but they serve different purposes.
A traditional mat board is a separate piece of material surrounding the photograph and, when properly mounted, can help keep the print away from the glazing.
A digital white border is part of the printed image. It creates a clean editorial look and makes it easier to use standard ready-made frames.
For valuable fine art photographs, I would favor archival-quality materials and appropriate framing.
Where to Find Affordable Picture Frames
Creating a beautiful gallery wall doesn’t mean every frame needs to be custom-made.
One economical approach is to choose standard frame sizes first and prepare the photographs to fit them.
IKEA
IKEA is a useful starting point for simple, contemporary frames in black, white, and natural tones.
Pay attention to the actual frame opening, glazing material, and hanging options.
Target
Target is worth checking for ready-made decorative frames, particularly for smaller prints and affordable gallery wall combinations.
Michaels
Michaels offers framing supplies and services. Check current promotions rather than assuming that any particular discount is always available.
Custom Framing
For unusually sized prints, valuable photography, or artwork you plan to preserve for many years, a local custom framing shop offers greater control over frame profiles, matting, glazing, and mounting.
I would rather spend money on good printing and proper protection than on an unnecessarily ornate frame.
How to Choose Photographs That Look Good Together
Even a perfectly measured gallery wall won’t feel cohesive if the photographs have no visual relationship.
This is where selection matters more than the number of frames.
- Choose a clear theme: travel, architecture, botanical studies, coastal scenery, or another recognizable subject.
- Limit the color palette: a few recurring colors are usually more effective than many competing hues.
- Look for a consistent mood: consider lighting, contrast, and the overall photographic treatment.
- Mix wide views and details: allow visually busy photographs to be balanced by quieter compositions.
- Consider directional lines: especially in architecture, perspectives can guide the eye into or away from the gallery.
- Edit the collection: a beautiful photograph isn’t automatically the right one for a particular wall.
My main photographs feature Lisbon, Tangier, and Málaga. I am still refining the smaller images to make the overall travel collection more consistent.
Having a large photographic archive makes that possible, although choosing just a handful of images can take longer than expected.
A Gallery Wall That Can Evolve
What I like about this arrangement is that the structure can stay while the photographs change.
New travel images, a different color balance, or a seasonal edit can refresh the room without replanning the entire wall.
A successful gallery wall doesn’t require expensive frames or perfectly matching photographs. Good proportions, careful selection, and accurate measurements matter considerably more.
And when the images represent places you’ve visited and experiences you remember, the result feels personal in a way that ready-made wall decor rarely can.